Mastering Zoho CRM Canvas: A Step-by-Step Guide
Zoho CRM Canvas is a powerful combination of Zoho’s customer relationship management software and Canva’s intuitive graphic design platform.
This comprehensive guide is tailored for users looking to leverage the innovative features of Zoho CRM Canvas to enhance their marketing and customer engagement strategies. Whether you’re a small business owner aiming to craft polished marketing materials or a sales professional seeking to impress with visually compelling presentations, this guide will walk you through every aspect of Canvas, from basic setup to advanced customization techniques. With practical insights and expert tips, you’ll learn how to maximize the Canvas tool to create dynamic, brand-aligned content directly within Zoho CRM, streamlining your workflows and elevating your customer interactions. Let’s dive in and transform your CRM experience with the power of Canvas!
Enhancing User Experience with Zoho CRM Canvas
In today’s fast-paced business environment, the need for a customizable and intuitive user interface (UI) in customer relationship management (CRM) systems is more critical than ever. Zoho CRM Canvas is designed to meet this need by offering a no-code design studio that allows businesses to create bespoke CRM interfaces tailored to their unique requirements. This article provides a step-by-step guide on how to utilize the Canvas feature in Zoho CRM to enhance both the aesthetic appeal and functional efficiency of your CRM system.
Getting started with Zoho CRM Canvas
To access this feature, simply navigate to the Canvas tab in your Zoho CRM dashboard. From there, you can create custom layouts to display your data in a visually appealing way.
Customizing your Canvas view in Zoho CRM is easy with the drag-and-drop interface. You can add widgets, charts, and lists to your canvas to suit your specific needs. Additionally, integrating social media networks with Canvas can help you keep track of customer interactions across platforms and streamline your social media marketing efforts. By utilizing this feature, you can create a more efficient and personalized CRM experience for your business.
Step 1: Accessing the Canvas Builder
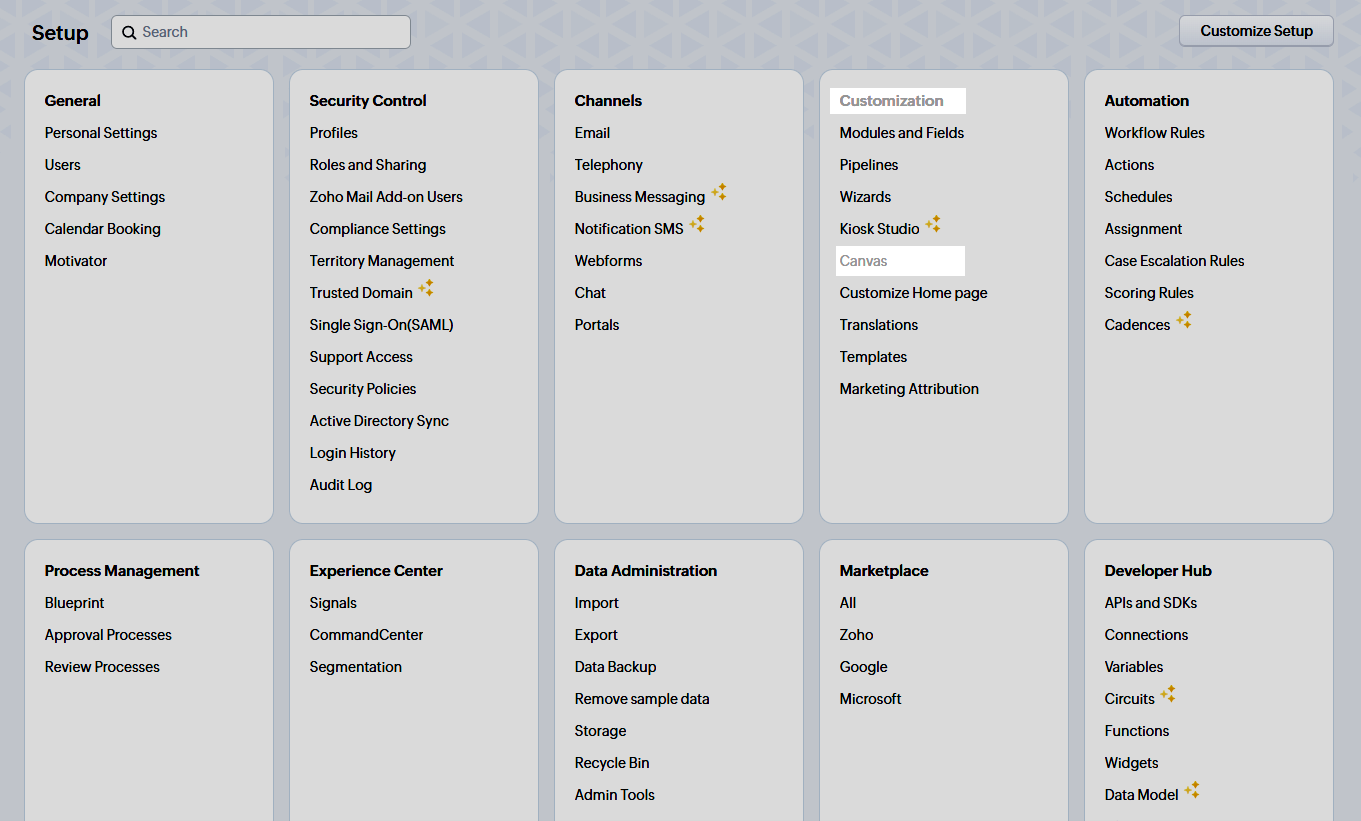
To begin with, you need to access the Canvas feature in your Zoho CRM account. Navigate to “Setup“, under “Customization” choose “Canvas“. This area is dedicated to creating and managing your custom CRM views.
Step 2: Choose a Template or Start From Scratch
Canvas offers a variety of pre-designed templates that cater to different business needs and sectors. You can select a template that closely matches your business process or start from scratch to create a completely unique design. Each template is fully customizable, ensuring that it can be tailored to the specific needs of your business.
Step 3: Designing the Interface
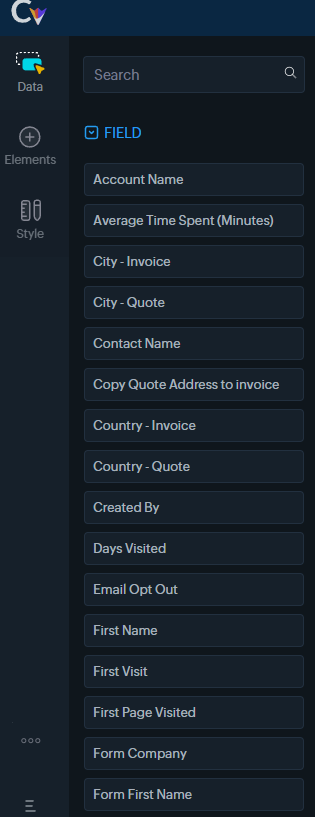
Canvas provides a user-friendly drag-and-drop interface, making it easy for users to design without any coding knowledge. You can drag elements like fields, buttons, and sections onto your canvas. It’s also possible to adjust the layout, add images, and change colors to align with your corporate branding. This customization can enhance user engagement and make the CRM system easier to navigate.
Step 4: Configuring Fields and Components
Each component on your canvas can be linked to specific CRM functionalities. For instance, you can configure fields to display specific customer data, and buttons to trigger actions such as sending emails or generating reports. This step is crucial as it defines the interaction between the user and the CRM system.
Step 5: Preview and Adjust
After designing your interface, use the preview feature in Canvas to see how it will look in a live environment. This is an opportunity to experience the interface from a user’s perspective and make any necessary adjustments. Ensure that all elements are correctly placed and that the interface is user-friendly.
Step 6: Publish Your Design
Once you are satisfied with the design and functionality, the next step is to publish your new interface. Canvas allows you to select which teams or departments will see the interface. This feature is particularly useful if you need different interfaces for different parts of your organization.
Step 7: Collect Feedback and Iterate
After deployment, collect feedback from the users to understand how the new design impacts their day-to-day activities. Use this feedback to make further improvements. Canvas’s flexibility allows for continuous enhancements without needing to go through complex development processes.
Conclusion
By implementing these guidelines, businesses can maximize the potential of their CRM system, ensuring it is not only functional but also enjoyable to use, which in turn increases user adoption and enhances data quality. If your team is struggling to fully leverage the Canvas feature, consider utilizing our custom Zoho CRM consulting packages. These tailored solutions are designed to ensure that your CRM aligns perfectly with your business processes, securing your productivity and facilitating seamless operation.
Is Canvas included in Zoho One?
Yes, Canvas is included in Zoho One. Canvas is a feature within Zoho CRM that allows for customization of the CRM interface without any coding. So, as a subscriber to Zoho One, you have access to all the features of Zoho CRM, including the Canvas design studio.
Is Canvas included in Zoho CRM Plus?
Yes, Canvas is also included in Zoho CRM Plus. Zoho CRM Plus is an enhanced version of Zoho CRM that bundles additional applications for a more comprehensive solution encompassing sales, marketing, customer support, and customer experience insights.