Deploying Kiosk Studio in Zoho CRM and Creating a Trigger Button
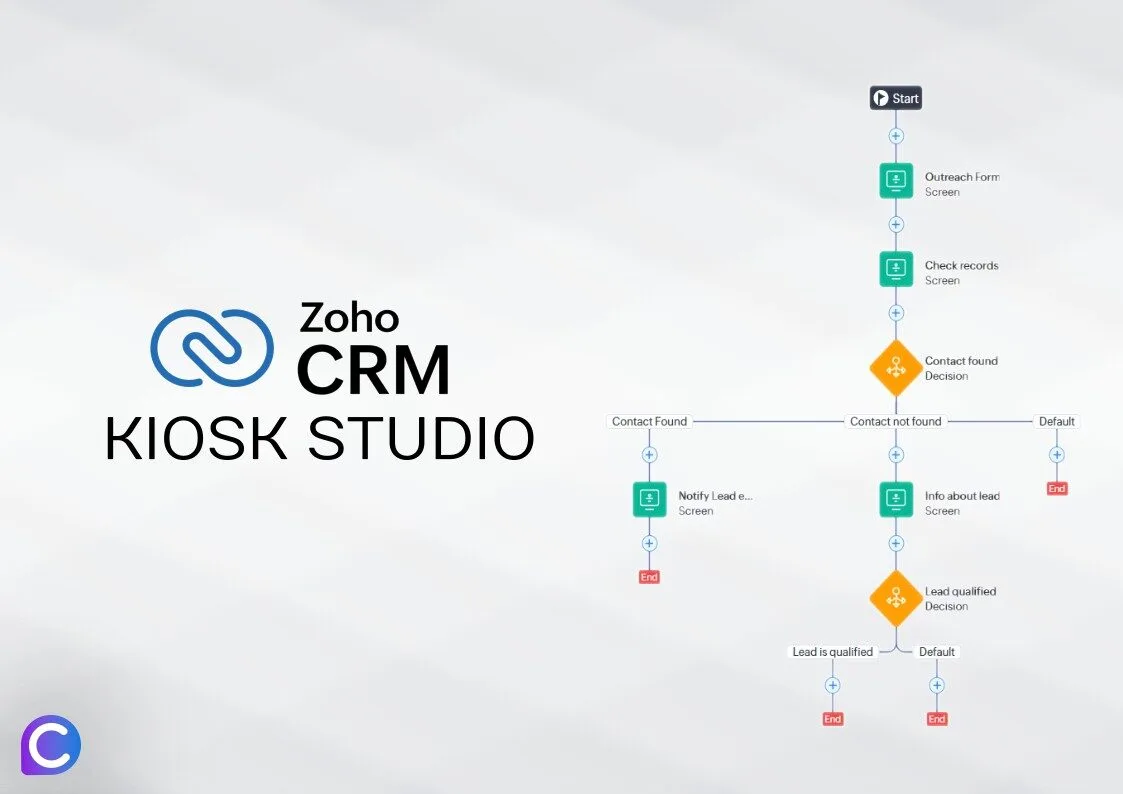
Step 1: Design Your Kiosk
Before creating a button, ensure your Kiosk is properly set up and tested. Here’s a brief overview:
- Navigate to Kiosk Studio: Access Kiosk Studio from the settings menu in Zoho CRM.
- Create and Configure Your Kiosk: Design the workflow, define the steps, decisions, and actions according to your business process.
- Test the Kiosk: Run several test cases to ensure the Kiosk performs as expected without errors.
For more detailed overview check this article: Optimizing process control with the new Kiosk Studio feature of Zoho CRM
Step 2: Creating a Custom Button
To create a custom button in Zoho CRM that will trigger the Kiosk, follow these steps:
- Go to Setup:
- Click on the Settings gear icon, usually found in the upper right corner of your Zoho CRM dashboard.
- Select Setup from the dropdown menu to enter the CRM settings area.
- Access Buttons and Links:
- In the Setup menu, navigate to Customization and find Modules and Fields.
- Pick a Module, where you want to set up your button.
- Click on tab called Buttons to open the button configuration area.
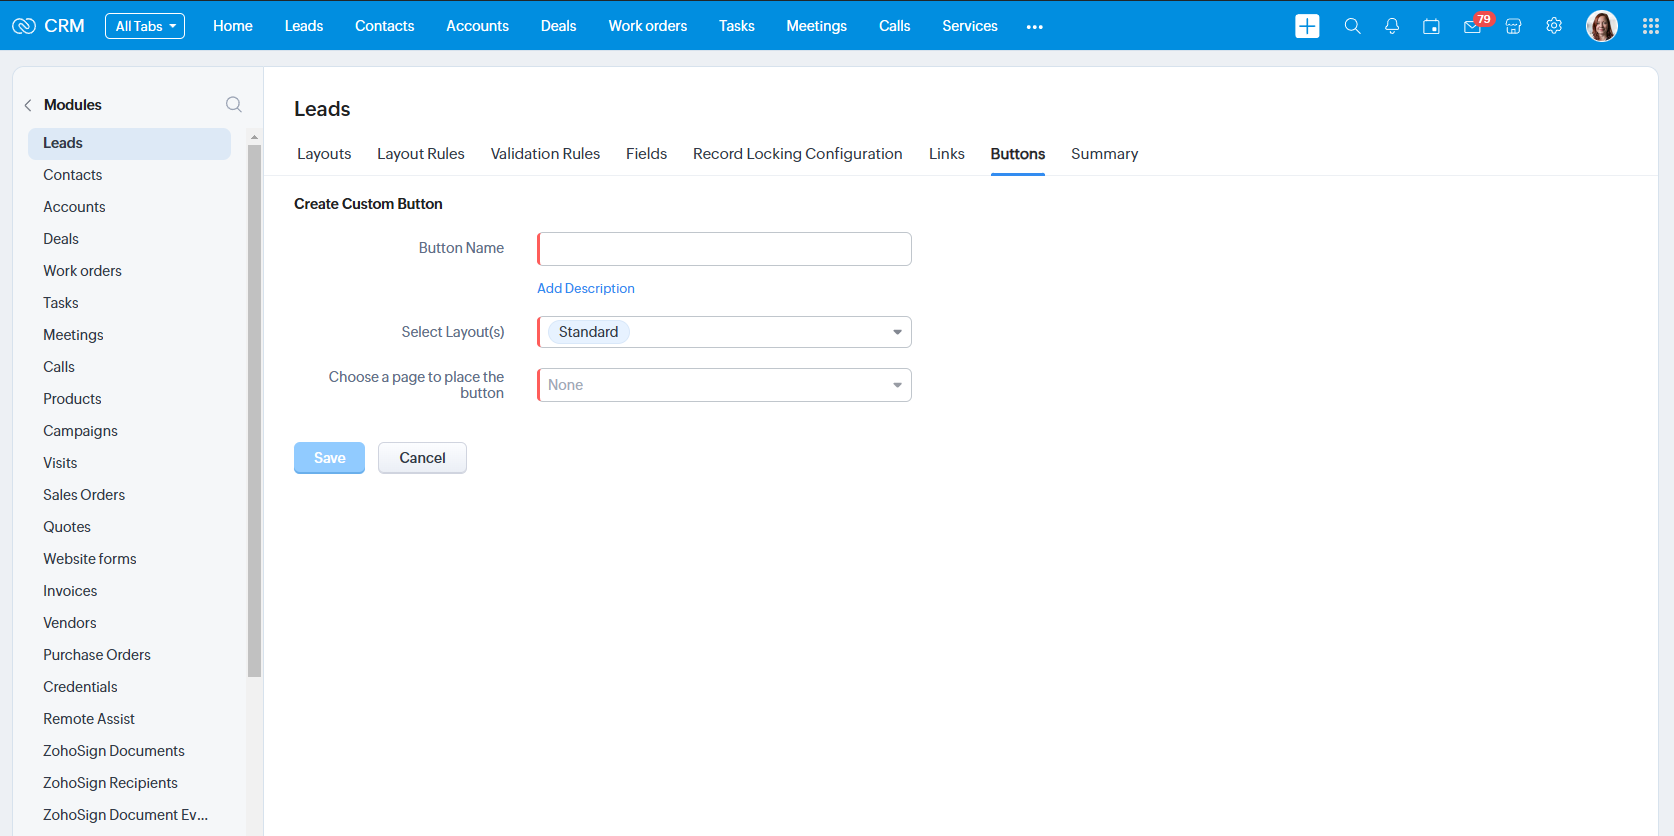
- Create a New Button:
- Click on + Create New Button. This will open a form where you can define the button’s properties.
- Fill in the Button Name (e.g., “Start Kiosk”).
- Choose where you want the button to appear. For instance, select List View or Detail View depending on whether you want the button on individual records or list pages.
- Define Button Action:
- Set the Function to invoke when the button is clicked. Select the Kiosk from the list of options to connect the button to your previously designed Kiosk function.
- Choose the Kiosk process that you want this button to trigger.
- Assign Profiles:
- Determine which user profiles can see and use the button. This ensures only authorized users can access the Kiosk.
- Save and Test:
- After setting up the button, click Save.
- Go to the module (e.g., Leads or Contacts) where you placed the button and verify that it appears as expected.
- Test the button to ensure it correctly launches the Kiosk.
Step 3: Deploying the Kiosk Studio
Once your button is created and functioning:
- Monitor Usage:
- Keep an eye on how the button and the Kiosk are being used to ensure they are effectively enhancing your CRM processes.
- Gather Feedback:
- Collect feedback from users about the Kiosk’s functionality and the ease of accessing it through the button.
- Make Adjustments:
- Based on feedback, make necessary adjustments to the Kiosk workflow or button placement to improve user experience and efficiency.
- Training:
- Provide training sessions if necessary to help users understand how to make the most of the new tool.
Integrating a Kiosk Studio with a custom button in Zoho CRM can significantly streamline complex workflows and improve data integrity. By following these steps, you ensure a seamless deployment that enhances user interaction and workflow management in your CRM environment.
The Kiosk Studio in Zoho CRM enables administrators to customize and manage interactive kiosks directly on the CRM homepage. It facilitates actions like fetching records, automating processes, and enhancing user interactions. If the setup seems complex, our expert CRM consulting can help streamline and optimize your use of this feature.